
When it comes to maintaining your car’s air conditioning system, cleaning the expansion valve is a crucial yet often overlooked task. The expansion valve plays a significant role in regulating refrigerant flow, ensuring optimal cooling performance. Over time, dirt, debris, and contaminants can accumulate within the valve, leading to inefficient operation and potential system malfunctions. In this comprehensive guide, we’ll walk you through the step-by-step process How to Clean Car Expansion Valve to ensure peak performance and longevity.
Understanding the Expansion Valve
Before diving into the cleaning process, it’s essential to understand the function of the expansion valve within your car’s AC system. The expansion valve is responsible for regulating the flow of refrigerant into the evaporator coil. By controlling the amount of refrigerant entering the coil, the valve helps maintain the desired temperature inside the vehicle.
Signs Your Expansion Valve Needs Cleaning
Several indicators suggest that your car’s expansion valve may require cleaning:
- Poor Cooling Performance: If you notice a decrease in cooling effectiveness or inconsistent cooling throughout the cabin, it could indicate a clogged or malfunctioning expansion valve.
- Icing on Evaporator Coil: Excessive buildup of ice on the evaporator coil can be a sign of restricted refrigerant flow, often caused by a dirty expansion valve.
- Strange Noises: Unusual sounds coming from the AC system, such as hissing or gurgling noises, may indicate issues with the expansion valve or other components.
Step-by-Step Cleaning Process
Now, let’s delve into the detailed steps involved in cleaning your car’s expansion valve:
1. Gather the Necessary Tools and Materials
Before starting the cleaning process, gather the following items:
- Safety Gloves and Eyewear: To protect your hands and eyes from chemicals and debris.
- Refrigerant Recovery Equipment: If you plan to remove refrigerant from the system before cleaning.
- Wrenches and Screwdrivers: For removing access panels and components.
- Cleaning Solution: Use a specialized AC evaporator cleaner or a mixture of mild detergent and water.
- Compressed Air: For blowing out debris from the valve and surrounding areas.
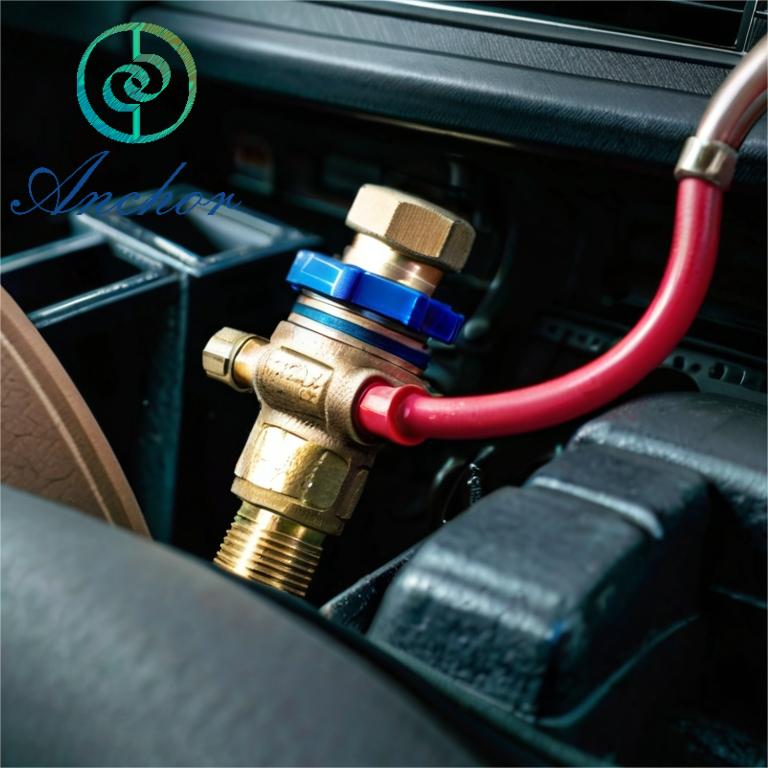
2. Locate the Expansion Valve
The expansion valve is typically located near the evaporator coil within the AC system. Refer to your vehicle’s service manual or consult with a professional technician to locate the valve accurately.
3. Prepare the AC System
If necessary, evacuate the refrigerant from the system using proper recovery equipment. Follow safety guidelines and regulations when handling refrigerants.
4. Remove Access Panels
Using wrenches and screwdrivers, remove any access panels or covers that obstruct access to the expansion valve and surrounding components.
5. Clean the Expansion Valve
Apply the cleaning solution to the expansion valve and surrounding areas, ensuring thorough coverage. Use a soft brush or cloth to scrub away dirt, debris, and buildup from the valve surfaces.
6. Flush with Compressed Air
Once the valve is clean, use compressed air to blow out any remaining particles or residue. Pay close attention to the valve’s inlet and outlet ports to ensure they are free of obstructions.
7. Reassemble and Test
After cleaning, reassemble any removed components and panels, ensuring proper sealing and alignment. Test the AC system to verify that the expansion valve is functioning correctly and that cooling performance has improved.
Conclusion
Regular maintenance, including cleaning the expansion valve, is essential for ensuring optimal performance and longevity of your car’s air conditioning system. By following the steps outlined in this guide, you can effectively clean the expansion valve and restore cooling efficiency to your vehicle.